Dienstag, 2. Oktober 2018

Quiet Book Sew Along - Seite 1: Das Weihnachtsmann Puzzle


Seid alle herzlich willkommen zum Start unseres Sew Alongs, ich freue mich über alle, die sich bei mir angemeldet haben :0)


Das Quietbook wird insgesamt 10 Seiten mit den Massen 23 x 25 cm haben. Es gibt eine reine Stoffbindung sowie eine Ringbindung zur Auswahl. Zuerst nähen wir alle Seiten und ihr könnt Euch dann für eine Bindung entscheiden.

Wir arbeiten jede Woche an einer neuen Seite, dann am Cover und anschliessend wird das Buch montiert und bekommt eine schöne Bindung.


Das Thema wird Weihnachten/ Winter sein und es wird so gestaltet sein, das auch Nähanfänger mitmachen können. Das Grundgerüst zeige ich Euch hier beim Sew Along - wie Ihr letztlich die Seiten gestaltet, z.B. mit besticken, Auswahl der Stoffe, Webbändern und anderen Extras bleibt Eurer Phantasie überlassen!


Everyone is welcome to the start of our Sew Along, I am pleased about all who have registered with me: 0)
The Quietbook will have a total of 10 pages with dimensions 23 x 25 cm. There is a pure fabric binding and a ring binding to choose from. First we sew all the sides and you can then decide on a binding.

We work every week on a new page, then on the cover and then the book is mounted 
and gets a nice bond.

The theme will be Christmas / Winter and it will be designed so that sewing beginners can join in as well. I show you the basic structure here at the Sew Along - how you ultimately design the pages, e.g. with embroidery, choice of fabrics, webbands and other extras is left to your imagination!


Heute beginnen wir mit der ersten Seite des Weihnachts – Quiet Books:
Today we start with the first page of the Christmas Quiet Book:


Das Weihnachtsmann Puzzle
The Santa Claus Puzzle

Materialien:
- Stoffstück mit 24 x 26 cm als Grundseite
- Volumenvlies (zum aufbügeln, ohne Kleber oder Baumwollvlies), ca. 23 x 25 cm
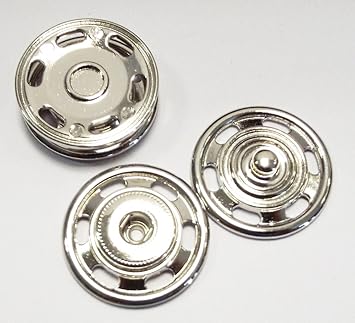
- Klettband oder annähbare Druckknöpfe
- Filz in den Farben weiss, rot, hautfarben
- Textilkleber
- Stickgarn, Nähgarn
Materials:
- Piece of fabric with 24 x 26 cm as the base side
- Volume fleece (iron on, without glue or cotton fleece), approx. 23 x 25 cm
- Velcro or approximate push buttons
- Felt in the colors white, red, skin-colored
- textile glue
- Embroidery thread, sewing thread


Grundseite im Stoffmix (basic page in the fabric mix)
Hier seht Ihr die Grundseite im Hochformat. Ich habe das zweite Buch im Querformat genäht und finde es fast besser damit. 

Die Grundseite hat eine Grösse von 24 x 26 cm. Ich habe sie hier unterteilt und mit einem Weihnachtsmotivstoff gemixt. 

Man soll ja die Teile gut erkennen können,da ist ein Unistoff prima.
Wenn Ihr Stoffe mixt, einfach drauf achten, das der untere Streifen nicht breiter als ca. 8 cm wird.
The base has a size of 24 x 26 cm. I divided them here and mixed them with a Christmas motive. One should be able to recognize the parts well, there is a solid material great.
If you mix substances, just make sure that the bottom strip does not become wider than about 8 cm.
Today we start with the first page of the Christmas Quiet Book:


Here are the templates for the Santa Claus Puzzle 

1. Vorlage ausdrucken und am Besten auf Pappe aufkleben und ausschneiden. Vorlagen auf den Filz aufzeichnen. 
Print template and glue it on cardboard and cut out. Record originals on the felt.


2. Für Gesicht und Nase wird nur ein Teil benötigt.
For face and nose, only one part is needed.

3. Gesicht und Nase auf der Grundseite mittig aufnähen.
Sew face and nose on the base in the middle.


Die Nase vor dem Nähen am Besten mit einem Tropfen Kleber fixieren

Fix the nose with a drop of glue before sewing

Ihr könnt die Teile mit Klettverschluss oder aufnähbaren Druckknöpfen versehen, ich zeige Euch beide Versionen hier.
You can provide the parts with Velcro or press buttons, I show you both versions here.


4. Für den Bart und die Mützenteile schneidet man einmal die Vorlage aus und benötigt dann noch ein gleich grosses Gegenstück aus Filz. 
For the beard and the cap parts you cut once the template and then needs an equal counterpart made of felt.


5. Klettverschlüsse anbringen: An den ausgeschnittenen Teilen die rauen Stücke des Klettbands annähen, diese sollten ca. 1,5 x 1,5 cm gross sein. Man kann sie auch vor dem annähen mit einem Klecks Textilkleber fixieren. Kurz antrocknen lassen vor dem vernähen! An allen vier Seiten aufnähen.
Attach Velcro fasteners: Sew on the rough pieces of Velcro on the cut-out parts, these should be approx. 1.5 x 1.5 cm in size. You can also fix them before sewing with a blob of textile glue. Allow to dry briefly before sewing!Sew on all four sides.


6. Dann das andere Stück Filz dahinterlegen, so das das Klettband oben ist (siehe Foto), rundherum absteppen.
6. Then put the other piece of felt behind, so that the Velcro tape is on top (see photo), stitch all around.


Anschliessend zuschneiden. 
Then cut to size.


7. Mütze zusammennähen, also Bommel und unteren Rand anbringen.
Sew the hat together, so attach the bobble and the bottom edge.


Die Bommel an der Spitze festnähen
Sew on the bobble at the top
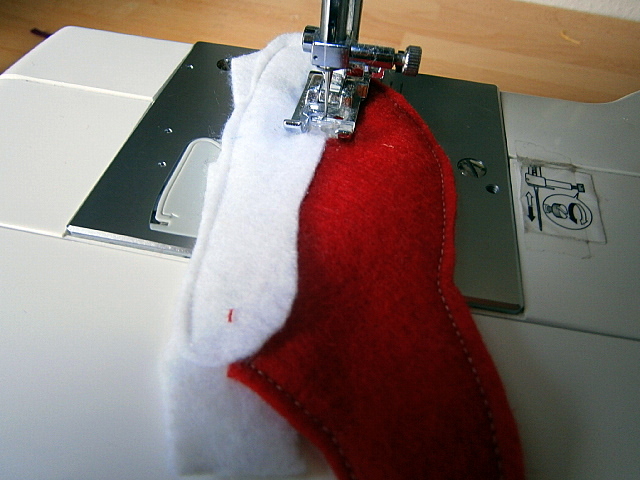


Den Hutrand von beiden Seiten ansetzen und festnähen
Position the hat edge from both sides and sew


So sollte sie dann aussehen
That is how she should look like...


Rückseite mit Klettband
Back with Velcro

8. Wenn die Teile fertig sind, auf das Gesicht auflegen, die Stellen für die gegenseitigen Klettbänder markieren. Festnähen! 
When the parts are ready, put on the face, mark the places for the mutual Velcro. Sew!


Mit dem Markierstift die genaue Position aufzeichnen.
Use the marker to record the exact position.


Das Klettband ringsum festnähen, Fertig!
Sew on the Velcro strip all around, ready!


Für die Version mit Druckknöpfen näht ihr einfach die Filzteile zusammen und befestigt die gezeigte Druckknopfhälfte auf der Rückseite der Mütze und der Bartteile.
For the version with press studs, you simply sew the felt pieces together and attach the half of the press button on the back of the hat and beard parts.


Teile auf das Gesicht legen und Stellen für die andere Druckknopfhälfte markieren. Festnähen.
Place parts on the face and mark positions for the other press-stud half. Sew on.


Jetzt muss nur noch das Gesicht bestickt oder beklebt werden, 

schon ist Eure erste Seite fertig...
Now only the face has to be embroidered or pasted, already your first page is ready ..


Nächste Woche geht es mit Seite 2 hier im Blog....
Ich hoffe, ich habe alles verständlich beschrieben.
Next week it goes with page 2 here in the blog ....
I hope I have described everything understandable.


verlinkt bei:

Ganz LG aus Dänemark, Ulrike :0)


Mittwoch, 19. September 2018

Arbeitswerkzeuge: Der Quietbook - Planer


Ich habe wegen dem Sew Along ein wenig herumgebastelt, damit ich die wichtigen Daten für mein Projekt auf einen Blick habe. 

Auf meiner "To Do Liste" stehen jetzt alle relevanten Dinge, die ich benötige, um ein Quietbook Projekt zu planen.
Das kann Euch sicher auch weiterhelfen, wenn Ihr später eigene Ideen umsetzen möchtet.

Hier findet ihr den Quietbook - Planer und könnt ihn Euch herunterladen.

Er beinhaltet:


Grundsätzliches wie z.B. was für ein Thema soll es sein? Tiere, Meer,..
Wie gross soll es werden?


Farben - man kann ein Buch auch in Farben planen, wenn es z.B. für einen Jungen genäht werden soll....


Aktivitäten - was soll das Kind entdecken und lernen können? Schleife binden, Verschlüsse, Farben, Formen, usw.


Seiten - Hier kann man überlegen und auch festlegen, welche Seiten man haben möchte. Z.B. Formen wie Dreieck, Kreis, Rechteck,...zum zuordnen


Inspiration + Ideen - was fällt einem spontan ein, hier kann man notieren, welche Einfälle man hat.


Einkaufsliste - welche Materialien müssen eingekauft/ bestellt werden?


Notizen - ein Feld für allgemeine Notizen


Materialiste - hier kann man konkret aufschreiben, welche Materialien man für sein Projekt benötigen wird.Erstmal wird alles gesammelt, was einem anhand der Seitenplanung einfällt.

Somit kann man dann ein komplettes Quietbook planen, denn es ist eine Menge Arbeit, bis man ein fertiges Buch in Händen halten kann. Deshalb sind die Bücher auch wirklich teuer, wenn man welche kauft, die sorgfältig und mit Liebe gemacht wurden.

Wenn Ihr Fragen habt, meldet Euch doch einfach bei mir, ja?

Ganz LG aus Dänemark, Ulrike :0)


Donnerstag, 6. September 2018

Weihnachts - Quiet Book Sew Along 2018 : Die Materialliste


Damit wir am 1. Oktober pünktlich mit dem Sew Along starten können, will ich Euch heute die Materialliste vorstellen.
 So könnt Ihr noch einige Sachen bestellen oder besorgen.

Bevor ich die Sachen aufliste, muss ich noch was loswerden. 
Für meine Bücher verwende ich entweder Stickfilz oder aber diesen tollen Wollfilz.
Der Wollfilz hier ist auch waschbar, blutet nicht aus und ist formbeständig. Ausserdem fühlt er sich wunderbar an :0)

Hannie vom Shop "Tintangel" hat Materialsets für das Sew Along zusammengestellt mit den Farben, die ihr für die Seiten benötigt.  Ihr könnt die Sets einfach bei ihr bestellen, wenn Ihr wollt, es gibt einen Rabatt von 10 % für die Teilnehmer des Sew Alongs.

Achtung! Code für 10 % Rabatt auf das Set: QBU2018

Der Filz ist sehr hochwertig und das halte ich für wichtig, wenn man schon so viel Arbeit in ein Projekt steckt.
Vielleicht habt Ihr aber auch selbst eine Bezugsquelle für Filz. Es soll nur kein Bastelfilz sein. Die Bezugsquellen, die ich nenne, habe ich ausprobiert und sollen nur ein guter Tip für Euch sein :0)

So that we can start punctually with the Sew Along on October 1st, I want to introduce you to the material list today.
 So you can still order or get some things.

Before I list things, I have to get rid of something.
For my books, I either use embroidery felt or this great wool felt.
The wool felt here is also washable, does not bleed and is dimensionally stable. He also feels wonderful: 0)

Hannie from the shop "Tintangel" has compiled material sets for the Sew Along with the colors you need for the pages. You can simply order the sets from her, if you wish, there is a 10% discount for the Sew Along participants.

Attention! Code for 10% off the set: QBU2018

The felt is very high quality and that's what I think is important if you put so much work into a project.
Maybe you also have a source of felt for yourself. It just should not be a craft felt. The sources of supply, which I call, I tried and should be only a good tip for you: 0)


Materialliste

- Stoffe in 9 verschiedenen Farben/ Mustern für die Buchseiten, jeweils 24 x 26 cm
Ihr braucht 10 Seiten, aber Vorder- und Rückseite können aus dem gleichen Stoff bestehen, prima sind Weihnachtsmotive, unifarbene Stoffe oder dezent kleingemusterte Stoffe, man kann sie auch prima mixen

- Filz (gute Qualität, möglichst waschbar, Woll- oder Stickfilz) in den Farben wie oben abgebildet, ca. 20 x 30 cm pro Platte

- Endlos Reissverschluss, 2x 20 cm plus 2 Schieber

- 1 Kam Snaps für den Verschluss der Lasche oder aber Klettband

- Gütermann Textilkleber, HT2 Universalkleber, flexibel, farblos austrocknend, bis 60 grad waschbar

- Klettband ca. 10 cm

- 2-3 kleine schwarze Knöpfe

- 5 Druckknöpfe zum annähen, 11 mm gross
Bildergebnis für prym druckknöpfe zum annähen

- 5 Haken und Augen zum annähen


- Stoffreste mit Motiven (Weihnachten, Tiere, Figuren, ...) zum applizieren

- breites (ca. 4 cm), weiches Webband/ Schmuckband, 2 Stücke à 40 cm und 1 Stück à 15 cm

- bei Stoffbindung: 2 Stück Stoff, die zur Vorder- und Rückseite passen: 25 x 30 cm + 29 x 11 cm , Vlies H250: 8x 15 cm

- bei Ringbindung: 2 Buchbinderringe, ca. Ø 50mm, 10 Ösen ca. 8-10 mm
Bildergebnis für buchbinderringe
- evt. Spiegelfolie zum aufbügeln, Krachmacher zum einnähen, Webbänder passend zum Thema, Knöpfe, kleine Gegenstände, Buchstabenperlen,Glöckchen....

- 6 kleine Ösen, ca. 4-5 mm

- Volumenvlies: 5 Platten à 24 x 26 cm, also braucht an ca.50 x 90 cm Volumenvlies am Stück

- wenn man dünneres Baumwollvlies ( Volumenvlies 279, Cotton 80/20) verwenden möchte, kann man jede Seite damit unterfüttern, also braucht man 10 Seiten à 24 x 26 cm

- Vliesofix für Applikationen, max. 20 cm bei einer Breite von 45 cm

- Nähgarn

- Stickgarn 

- Stylefix, evt. Wonder Dots

- Markierstift, evt. Bleistift zum anzeichnen

- ein bunter Schnürsenkel oder eine flache Kordel, ca. 80 cm

- Kordel, rund, Ø ca. 4 mm, ca. 50 cm

- ein Stück Vinylfolie (durchsichtige Tischdecke) von ca. 20 x 20 cm

- evt. Variozange für Ösen anbringen


Material list

- Fabrics in 9 different colors / patterns for the book pages, each 24 x 26 cm
It needs 10 pages, but the front and back can be made of the same material, are great Christmas motifs, plain fabrics or discreetly small-patterned fabrics, you can also mix them well

- Felt (good quality, preferably washable, wool or embroidery felt) in the colors as shown above, about 20 x 30 cm per plate

- Endless zipper, 2x 20 cm plus 2 sliders

- 1 came snaps for the closure of the tab or Velcro tape

- Gütermann textile adhesive, HT2 universal adhesive, flexible, colorless drying, washable up to 60 degrees

- Velcro tape about 10 cm

- 2-3 little black buttons

- 5 snaps to sew, 11 mm
Image result for prym snap buttons to sew on

- 5 hooks and eyes to sew on


- Cloth remnants with motives (Christmas, animals, figures, ...) to apply

- wide (about 4 cm), soft woven ribbon / jewelry tape, 2 pieces à 40 cm and 1 piece à 15 cm

- for fabric weave: 2 pieces of fabric to match the front and back: 25 x 30 cm + 29 x 11 cm, fleece H250: 8x 15 cm

- for ring binding: 2 bookbinder rings, approx. Ø 50mm, 10 eyelets approx. 8-10 mm
Picture result for bookbinder rings
- Maybe mirror foil to iron on, noisemaker to sew, woven ribbons suitable for the subject, buttons, small objects, letter beads, bells ....

- 6 small eyelets, about 4-5 mm

- Volume fleece: 5 plates of 24 x 26 cm, so it takes about 50 x 90 cm volume fleece in a row

- If you want to use thinner cotton fleece (Volume Fleece 279, Cotton 80/20), you can reline each side with it, so you need 10 pages à 24 x 26 cm

- Vliesofix for applications, max. 20 cm at a width of 45 cm

- sewing thread

- Embroidery thread

- Stylefix, evt. Wonder Dots

- Marking pen, possibly pencil to mark

- a colorful shoelace or a flat cord, about 80 cm

- Cord, round, Ø approx. 4 mm, approx. 50 cm

- a piece of vinyl foil (transparent tablecloth) of about 20 x 20 cm


Freundlicherweise werde ich beim Sew Along von Snaply Nähkram unterstützt.
Hier seht  Ihr die meisten Materialien, die gebraucht werden.


Vliesofix, doppelseitig klebend, zum aufbügeln


verschiedene Baumwollstoffe, gerne auch mit Winter- oder Weihnachtsmotiven.

Schneemänner


Krachmacher zum einnähen: Quietscher, Rasselboxen,...


Webband, Wonder Dots für die Ösen


superpraktischer Markierstift zum aufzeichnen auf Filz und Stoff


Bezugsquellen:

Snaply Nähkram: Nähzubehör, Stoffe, Vliese, bunte Ösen
Thal Versand: Heftringe, Aluminiumringe
Wollfilz: Tintangel Shop, Materialkits
Prym: Druckknöpe, Haken

Hier findet Ihr den gesamten Ablauf des Sew Along
Wenn Ihr noch Fragen habt, einfach kurz mailen :0)'

Here you will find the entire process of the Sew Along
If you have any questions, just send a short message: 0) '

Ganz LG aus Dänemark, Ulrike :0)